Floor tiles can completely transform a room, whether you’re using large-format natural stone tiles in the kitchen, patterned tiles in the hallway, or moisture-resistant bathroom tiles. However, when tiling a floor it is important to take your time and follow the correct steps to ensure you have the perfect finish. Rushing a tiling project, or installing tiles inaccurately can create issues with the floor, such as raised tiles, uneven surfaces and loose or cracked tiles.
We have a wide range of floor tiles to choose from, as well as a number of tools and accessories to improve the tiling process. If you’re unsure of exactly what you need in order to tile a floor, don’t hesitate to get in touch with our team and they will be more than happy to offer product recommendations and advice – just call 01752 581507 or use the live chat in the bottom right-hand corner.
1. Prepare the floor

Before laying your floor tiles, it is important to ensure the floor is clean, dry and clear from any debris and dust. If laying floor tiles onto a concrete subfloor, we’d recommend installing a damp proof course between the subfloor and the tiles, and if this isn’t possible use a waterproof primer to prevent water from being trapped between the subfloor and the tiles.
If the floor is uneven, you may need to apply a self-levelling compound to the surface in order to fill in any dips and slopes within the subfloor. If using a self-levelling compound, ensure it dries fully before beginning to tile the floor.
 2. Planning the tile layout
It’s important to plan out the floor tile layout in order to ensure the tiles are laid accurately and evenly – many rooms aren’t completely square so starting from one wall and tiling across will not be effective.
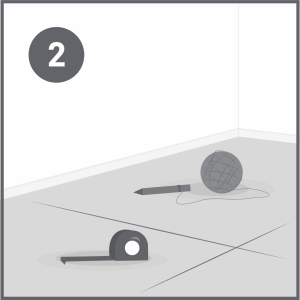
The first step is to find the centre of the room – the key tile will determine the position of all the other tiles.
Measure one wall, calculate the midway point of the wall and mark it on the floor, before repeating with the opposite wall. Then stretch a chalk line between the two midpoints to create a straight centre line. Now calculate the midpoint of this line.
Then tie a piece of string (about 1m long) to the pencil, put the end of the string on the midpoint, and mark an arc with the pencil where the pencil falls when it is pulled taught. The arcs should be at roughly 45 degrees on either side of the centre point. Now repeat this on the other side, and use a chalk line to connect the two arcs across the floor. You should now have two lines intersecting at the centre of the room. The centre point is where the first tile should be laid.
3. Tiling the floor
Once the centre point has been found, tiles can be laid. If you’re tiling a floor in a room that needs to be accessed, it might be worth tiling half the room at once, and waiting until the first half is dry before starting to tile the second half of the room.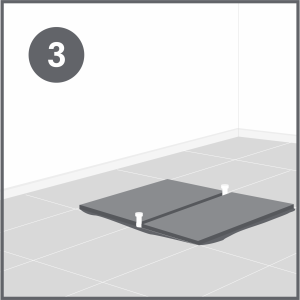
Before adding adhesive, try laying the tiles out to check that they sit well and give the appearance you are looking for.
Start in the centre of the room, and pour around 1 metre squared of adhesive on the floor. It’s always important to check the manufacturer’s instructions for more detailed information on the amount of adhesive required. Spread the adhesive with a notched trowel, but make sure you can still see the starting line in the centre as a guide of where to place the key tile.
Now place the key tile into position, and give it a slight twist to ensure it is bedded well into the adhesive. Then work outwards in blocks of four tiles, placing plastic spacers between each tile – this will ensure an equal gap between each tile. Make sure the spacers are pushed in firmly, as these should be covered after grouting the tiles. Whilst working, keep checking the tiles have been laid level by using a spirit level. Tap any that are slightly risen with a rubber mallet to push them down into place.
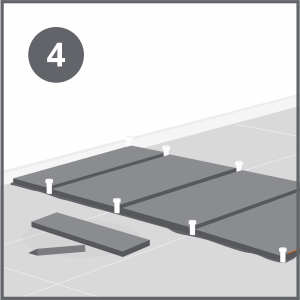
Once you’ve covered the first area of adhesive, give the tiles a wipe using a sponge to remove any excess adhesive. Then move onto the rest of that quarter of the room to the edges, until there is no more space to place whole tiles. Once the quarter of the room has been finished, move on to the next quarter of the room and repeat the above processes. Remember to leave the quarter by the door until last so you can leave the room.
Once the whole floor has been tiled (apart from the edges), leave the floor to dry – this time will be specified by the adhesive manufacturers.
4. Tiling floor edges
Once the adhesive on the main tiles has dried, the edge tiles can be cut to shape and installed. To do so, measure the space that needs filling with a piece of tile, or sit the tile on top of the gap and draw a line at the point the tile reaches the whole tile laid next to the gap. The tile can then be cut using a tile cutter or glass cutter – smooth any edges with a tile file or brick.
Once the tile has been cut, apply adhesive to the back of the tile, before placing it into position and pushing it down into place. Don’t forget to add tile spacers and ensure that the tile has been laid level.
5. Grouting floor tiles
Once the adhesive has completely dried, the grouting process can begin.
Use a grout float or similar tool to scoop up some of the grout, and apply it to the joints in between the tiles. Use a smooth movement, but press the grout into the joints until it is compact and level with the tile surface, covering the spacers.
Grout several rows, and then take a grout finisher to run along the grout lines for a neat finish. Use a damp sponge or cloth to wipe away any excess grout before it sets and before moving on to the next section of grouting. Once you’ve grouted the whole floor, leave it to dry and avoid walking on the floor. The drying process can vary depending on the type of grout and the manufacturer, so read the instructions on the grout packaging for an accurate idea of drying time.
Once the grout has set, use a damp cloth to remove any excess grout, then dry it with a dry cloth. Apply silicone sealant around the edges of the floor at the point where the floor meets the wall.
Your floor tiles should now be fully installed! Don’t forget to seal your new tiles for better performance.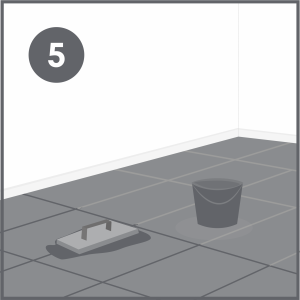

Was this guide useful?
Mentioned in this project guide:


